
The Definitive Recipe for a Modern Grandma Pizza
Last updated on November 12th, 2023 at 06:56 pm
Today we are going to take a traditional authentic Grandma Italian Pizza Recipe directly coming from my family and make it modern. Welcome to the Definitive Recipe for a Modern Grandma Pizza!
As you will discover reading this article, there is not so much changing than a standard Pizza Recipe. Actually, if you used already my Recipe Calculator, you will notice that we are going to use the same ingredients of a Pizza in Baking Pan, although not with same proportions. In fact we will be careful in adapting the process to some of the new “standards” to have a soft, fluffy Pizza. Moreover this time I will be leveraging my Spiral Mixer, which is a big difference than what my Grandma was doing.
Are you ready to start this authentic Italian Pizza Recipe? Great! As always let’s start with a summary of the topics we are going to cover:
- Process in a nutshell: steps to make Italian Grandma Pizza
- Recipe for the Modern Grandma Pizza
- Preparing and mixing ingredients for Pizza Dough
- “Staglio” and Second fermentation
- Preparing Recipe for Pizza Sauce
- Stretching Pizza
- Cooking Pizza in home oven
Process in a nutshell : Steps to Make Italian Grandma Pizza
Before sharing the Pizza Recipe I would like to prepare you about all the steps we need to follow. This is important to make sure you have enough time and all ingredients ready.
Making this Italian Pizza will involve the following steps:
- Prepare and mix ingredients
- Have a First Fermentation in fridge
- Second fermentation at room temperature
- Preparation of the Pizza Sauce
- Stretching in sheet tray, seasoning and cooking Pizza Dough
In total you will have to consider a 24/30 hours time before you can serve your Pizza. However the majority of the time is to wait for the Pizza to mature/ferment, so you don’t really need to be dedicated full time to it. My estimation is that the recipe will require about 1 hour and 30 minutes of real working time.
One more thing. When it comes to ingredients, pay attention to the flour. We are going to keep the pizza dough in fridge for a lot of hours, therefore we need a flour that has enough proteins to sustain such a long fermentation. My recommendation is to use a general-purpose flour (or Tipo 0 in Italian) with a W value of 300 or more. If you do not have the W value indication, try to use a flour with 13.5/14% of Proteins. If you feel particularly brave you can also use a 10% of Semolina Flour or “Tipo 1“. Doing so is even a good idea in the Definitive Recipe for Modern Grandma Pizza.
Recipe for Modern Grandma Pizza
Every Pizza starts with a Pizza Dough recipe. Obvious! During last weeks I mainly prepared Pizza Dough with Stiff Sourdough. I like the taste very well and my grandma was also using stiff sourdough for her Pizza. However maintaining Stiff Sourdough is not something that everybody is doing.
Reviewing articles I already wrote on this website I realized that I needed to share a modern recipe for Pizza that is using standard yeast. The most obvious and easy step to do was then to take one of the authentic grandma Pizza recipe and rearrange it to make it modern and relatively easy.
So, here we go with my definitive recipe for a Modern Grandma Pizza. The dough you are going to make with ingredients below will be perfect for a single 30x40cm sheet Tray. If you want to make more than one pizza you can obviously multiply ingredients by the amount of
This Pizza Dough will be perfect for a 30x40cm sheet tray
| Ingredient | Quantity |
|---|---|
| Flour | 386 gr |
| Water | 270 gr |
| Yeast | 5.8 gr |
| Salt | 11.5 gr |
| Oil | 8 gr |
| Malt | 2 gr |
Remember that in case you do not have Malt you can simply skip it or add the same quantity of flour.
Preparing and Mixing Ingredients for Pizza Dough
If there is one element that I wanted to make sure was in this recipe then it is the usage of a mixer. This pizza has to be modern therefore we could not make it by hands, right?
Also, so far I did not share any recipe using a Spiral Mixer then I thought it would make sense to share the process using it. Does it mean you cannot do it with a standard Stand Mixer? Not at all! You can do exactly the same Pizza using stand mixer or even mixing by hands. The real difference will be in fact in the mixing process. We covered already in the past some of the differences in mixing using different techniques. I highly recommend to read that article too.
I would like you to consider to subscribe to my newsletter. It’s free, you will get a Recipe Notebook to download and you will never lose my new tips & tricks around the world of Italian Pizza. I hate spam too, so no worries, subscribe with confidence:
Get ingredients of definitive Recipe for a Modern Grandma Pizza ready
The first thing you want to make sure you do is to prepare your ingredients in advance.The most important one will be to have cold water (of course assuming you already have the proper flour). Water can come directly from the fridge or even taken out of a couple of hours in the freezer. In nay case yuo want to have very cold water.
As I often do not have time or I forget to put water in fridge/freezer, I now always have a plastic bottle filled with half of its capacity in freezer. Thanks to this trick I can simply take the frozen water out of the freezer, add room temperature water and have it cold at any time during the day in few minutes.
I weigh flour, yeast and malt all together using a bowl. As we are going to use the Spiral Mixer we have to leverage a separate bowl for weighing purposes. Remember that if you use dry yeast you need to activate it first if required. Moreover, you need to divide by 3 the amount of yeast I indicated in the recipe above.
Keep salt separate from other ingredients. We are going to add it in a second stage of the mixing to make sure it does not get in direct contact with the yeast.
Last, divide water in two parts possibly using two recipients: 70% of the water goes in one and 30% in the second. The goal is to use the first part of the water all together when we start mixcing while adding the remaining 30% percent when the gluten mesh starts to appear (more on this later).
We are now ready to move to the next step of the process: mixing the Pizza dough ingredients in a Spiral Mixer.
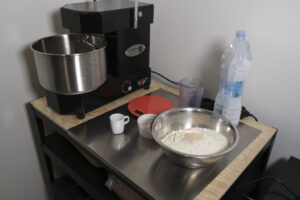
How to Prepare Pizza Dough using a Spiral Mixer
The Spiral Mixer requires a specific approach to kneading. A lot of people think that having a Spiral Mixer will simplify everything and will make them professional pizza makers. The truth is a bit different.
While the Spiral Mixer for Pizza Dough is probably the best option you can have (especially at home), we need to deal with the fact that kneading requires a different approach than stand mixers or hand kneading.
Therefore I want to share a high level overview of what you should do when mixing Pizza dough ingredients with a spiral mixer. For a deeper explanation I am planning to have a dedicated article though.
Tip: start a timer on your smartphone and measure for how long you are kneading
So let’s get started and:
- transfer the ingredients you put before in the bowl (flour, yeast and malt) into the Spiral Mixer;
- close the lid (or I should have said protection) and turn the mixer on at low speed. I use 80/100 RPM maximum;
- after 20/30 seconds start adding the initial part of the water (the 70% we separated before) slowly. It should take roughly 20 seconds to pour it fully;
- then let the spiral mixer go and when you notice that the gluten mesh starts to create add the salt and a bit of the water from the remaining 30%;
- Now, increase the speed of the spiral to 200 RPM and as soon as the water just added is absorbed, add a bit more water (do not add too much!!), wait for it to be absorbed and do it again until you finish all the water;
- After the last water is absorbed, you can add oil. Do it in two times with the same approach used for the water.
The entire process should last no more than 15 minutes. Tip: start a timer on your smartphone and measure how long you are kneading. Take a note if you where too fast or too slow so that next time you can adjust the process and make the definitive recipe for a modern grandma pizza even better!
Final Step of kneading the Modern Italian Grandma Pizza
Once you finished to knead, take the Pizza dough out of the mixer bowl, make it a single dough ball only with some folding and put it in a recipient that can contain three times its current shape.
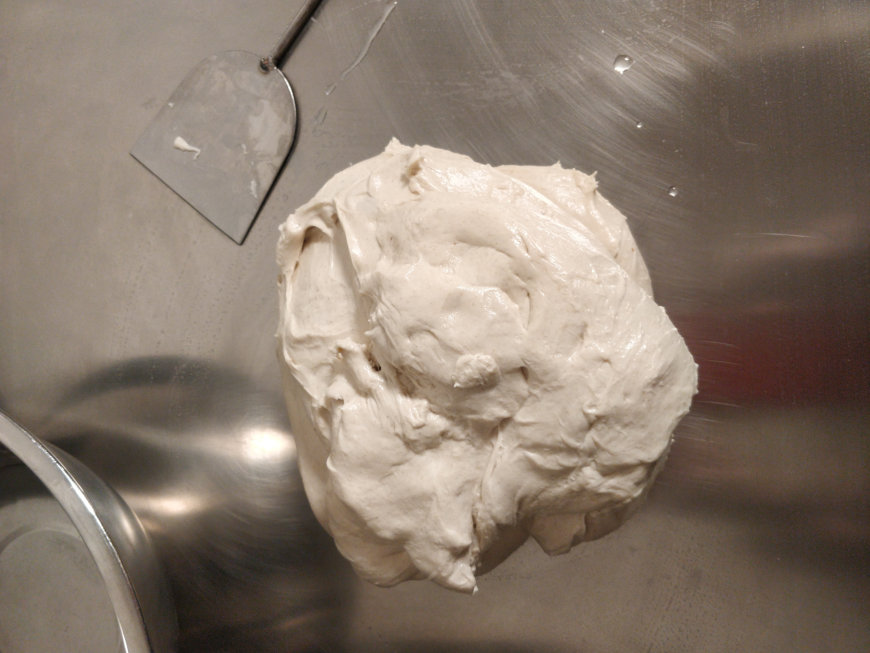
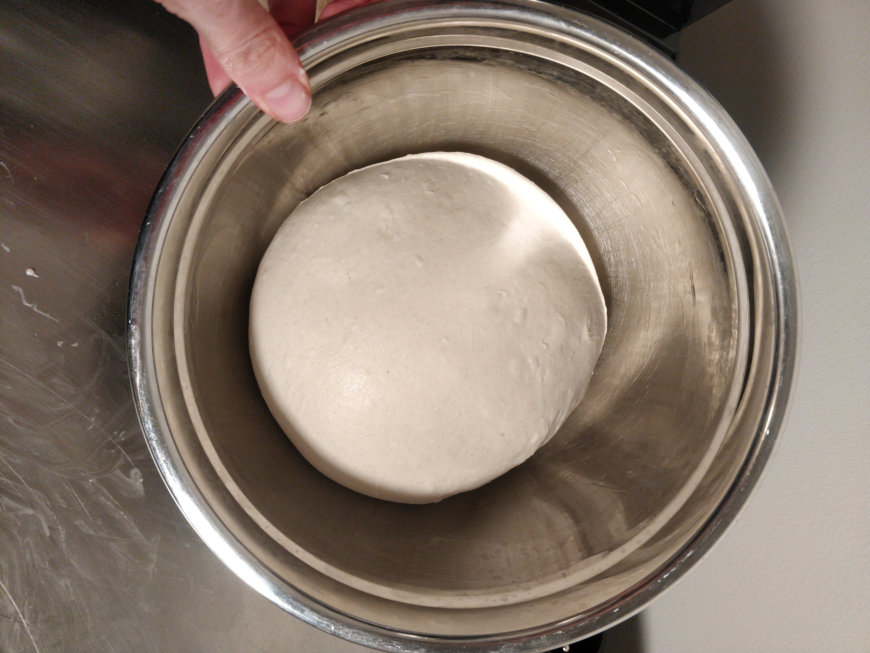
It is important to mention that you need to use a recipient that is not too big. You want that the dough is touching the borders of it so that it is helped in creating its structure while fermenting.
After about 15 minutes you can move the pizza dough in the fridge where it has to stay 18/22 hours or until it doubles.
“Staglio” and second fermentation
Once the dough is doubled, take it off the fridge. If you prepared the recipe for more than one sheet tray then this is the moment to create your dough “balls” that will go in the sheet trays.
While the dough is still cold, using a dough scraper divide the dough in smaller pieces of ~680 gr each. Pay attention to this step following these tips:
- manipulate the dough gently trying to avoid to touch it too much;
- make sure to keep the smooth surface of the dough intact.
No matter if you have a single sheet tray to fill or more than one, the following steps apply:
- put the smooth surface of the dough (the one that is on the top after the first fermentation) in Semolina or rice flour. Again: touch it the less you can!
- gently take the sides of the dough and fold them to the center. Do it for all sides until you have a “closed” dough ball;
- turn the dough ball upside down;
- create tension on the surface;
- put the dough ball in a recipient for the second fermentation;
- wait for the dough ball to grow 2.5 times the initial size.
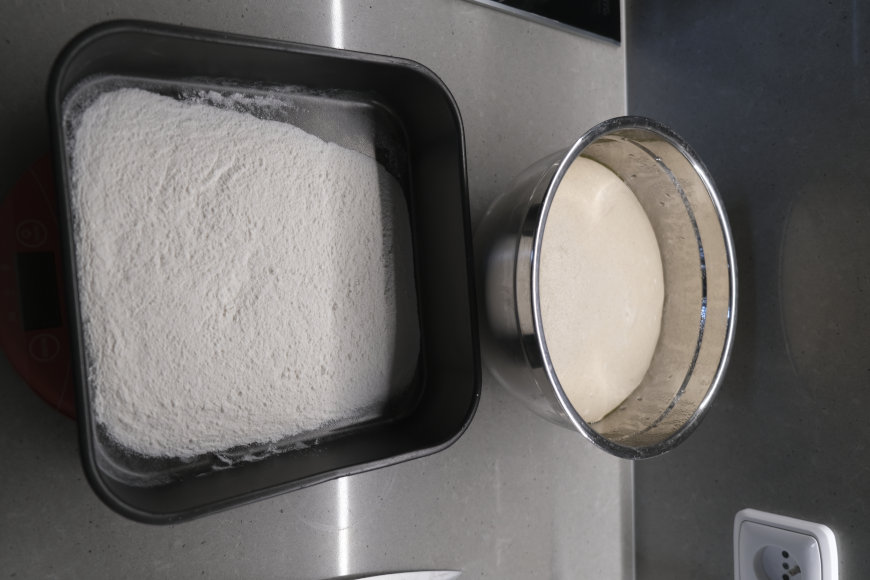
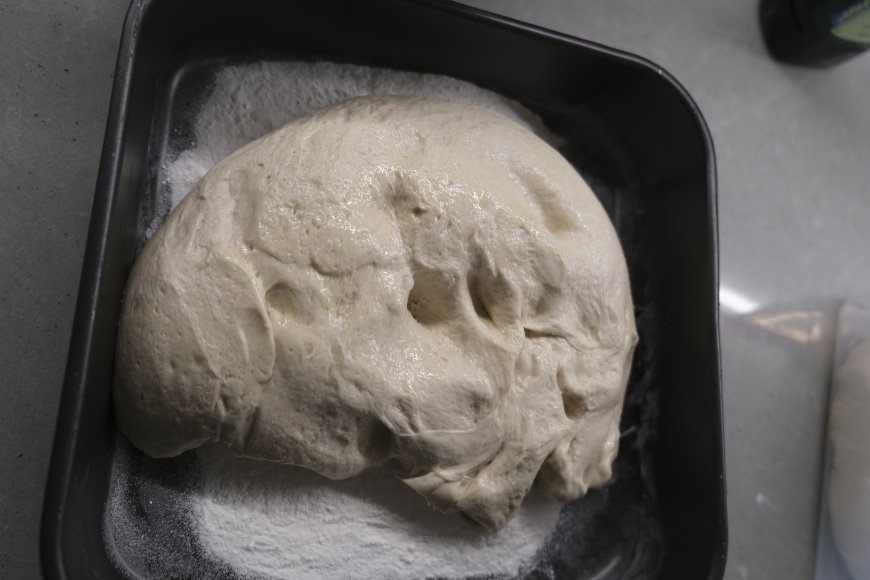
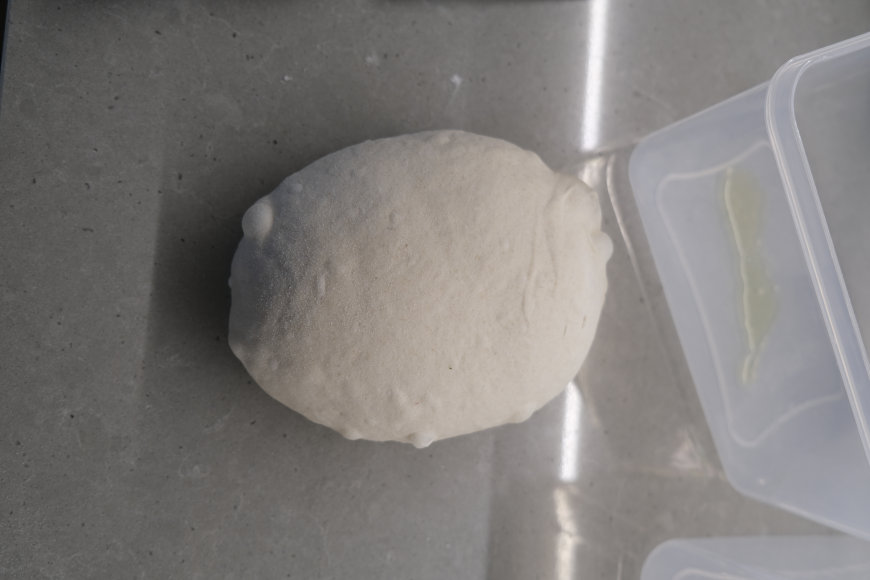
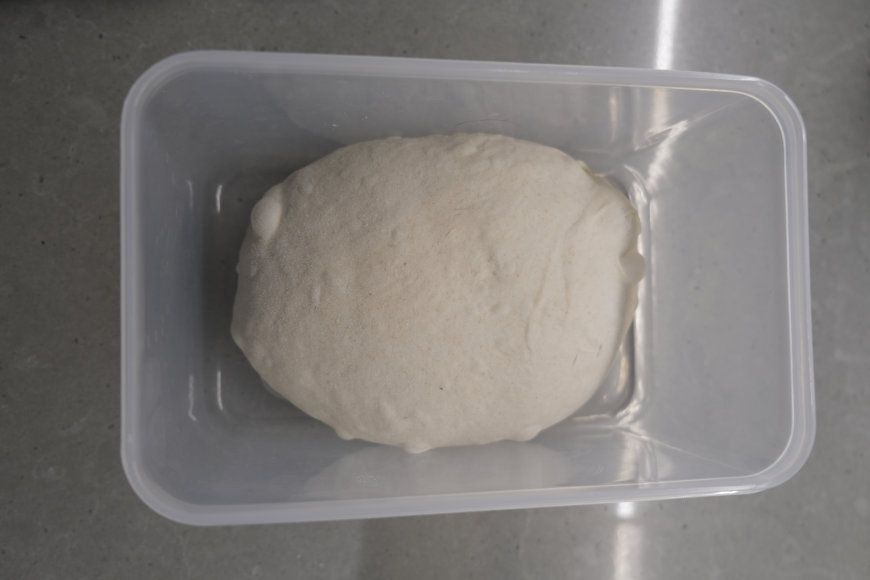
The second fermentation should take 3 to 4 hours depending on the the temperature you have at home.
I would like you to consider to subscribe to my newsletter. It’s free, you will get a Recipe Notebook to download and you will never lose my new tips & tricks around the world of Italian Pizza. I hate spam too, so no worries, subscribe with confidence:
Preparing Recipe for Pizza Sauce
While the Pizza dough is doing its second fermentation it’s time to prepare the Pizza Sauce! We want to do it now because it needs time to cool down before we add it on the on the stretched pizza.
It’s time to prepare the Pizza Sauce!
This is a pretty easy recipe. One of the most famous Tomato Sauce that you can use also for Pasta 🙂
We are going to use a can of 400 gr for every sheet tray. Following is the super easy process.
Take a pan of 18/20 cm of diameter, add 2 spoons of Extra Virgin Olive Oil, turn on the cooker on low heat and when the oil starts to warm add a single clove of garlic.
Keeping low heat, fry the garlic on all sides (make sure oil is not going too high in temperature) until it starts to change color. At this point add whole pealed tomatoes (ideally of San Marzano quality). With the help of a fork squeeze tomatoes making them a sauce.
Last, add 5 gr of salt, cover the pan with a lid and let the tomato sauce cook for about 10 minutes making sure you mix from time to time to avoid the sauce to stick to the pan.
Last step is to wait for this fantastic Tomato Sauce for Pizza to cool.
Stretching Pizza for Sheet Tray
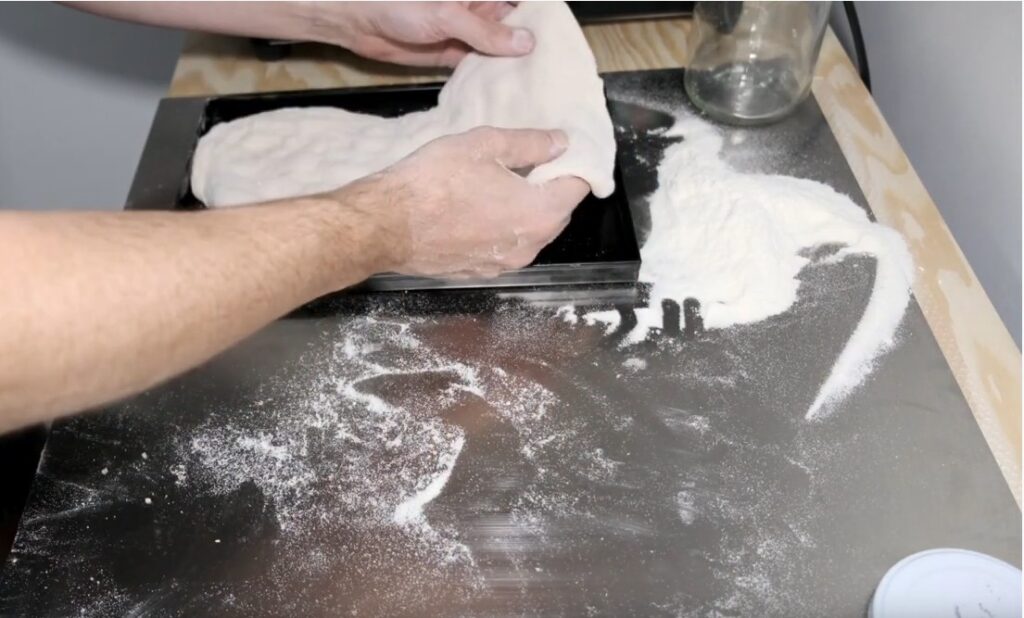
When the Pizza Dough is ready (meaning that its size grew by 2.5 times the initial size) we need to prepare it to go into the sheet tray. We can decide to use two different techniques: we can stretch the ball directly in the sheet pan or we can stretch the Pizza in the flour first. I definitely prefer this second option for the recipe I am sharing. In both cases add and spread a thin layer of olive oil in the sheet tray in advance.
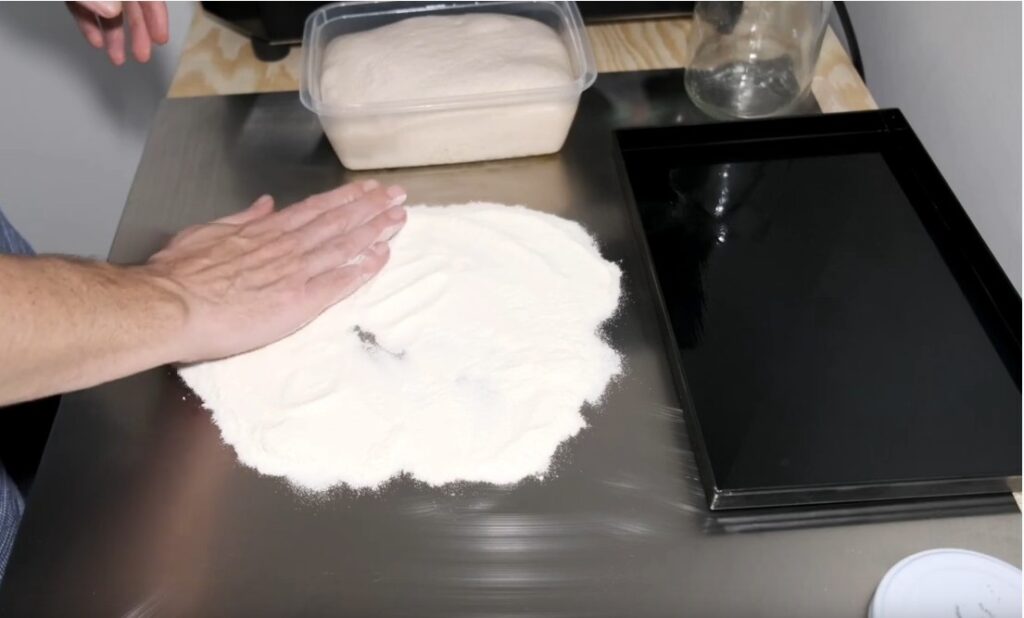
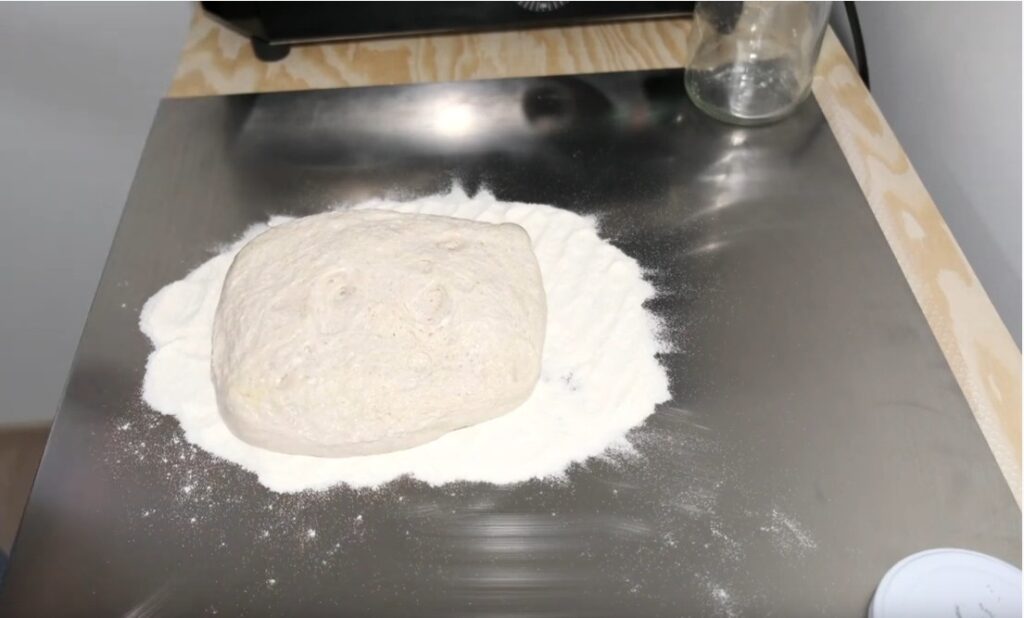
So prepare your work surface with some semolina flour or rice flour. Then:
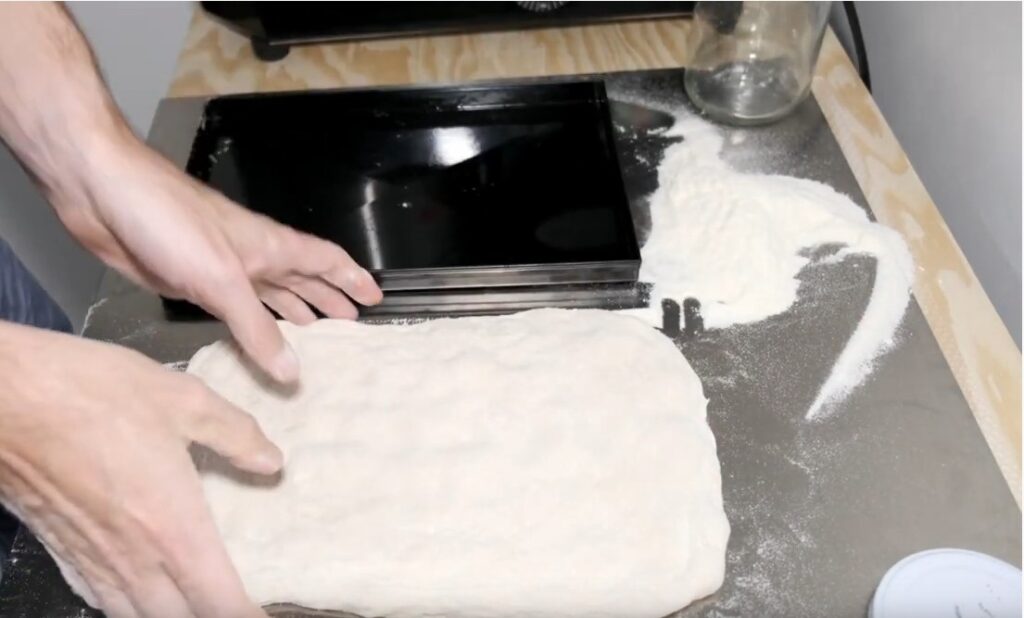
- take your sheet pan close to the surface covered by flour: it will help measuring how much the dough is stretched
- move the dough out of its recipient putting it upside down and letting the dough falling in the flour
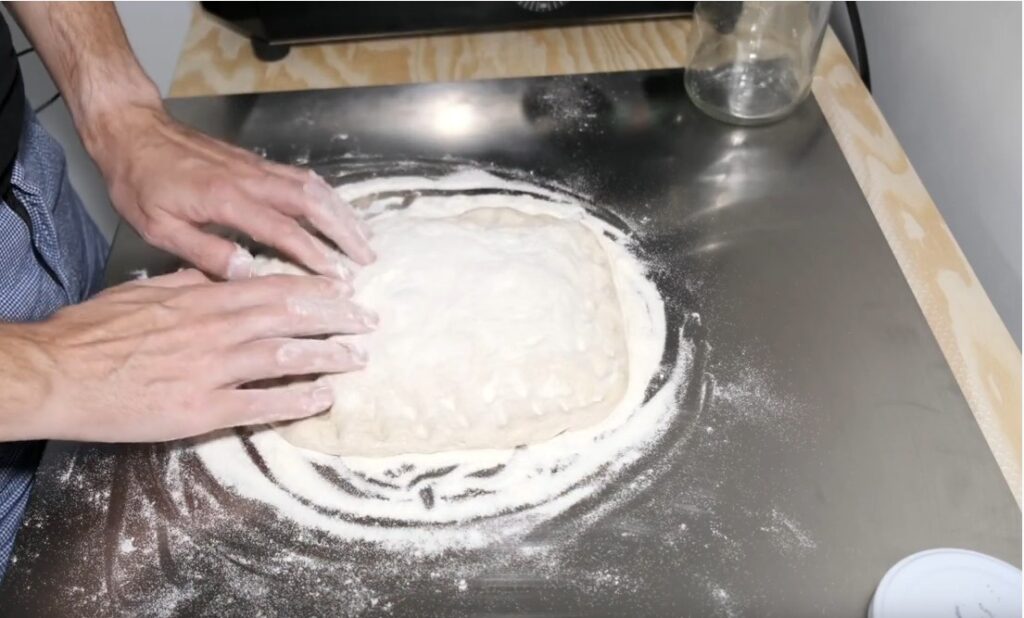
- start stretching the dough with the tip of your fingers starting from the sides and moving to the center
- repeat the above 2-3 times until the dough becomes more or less of same size of your sheet tray
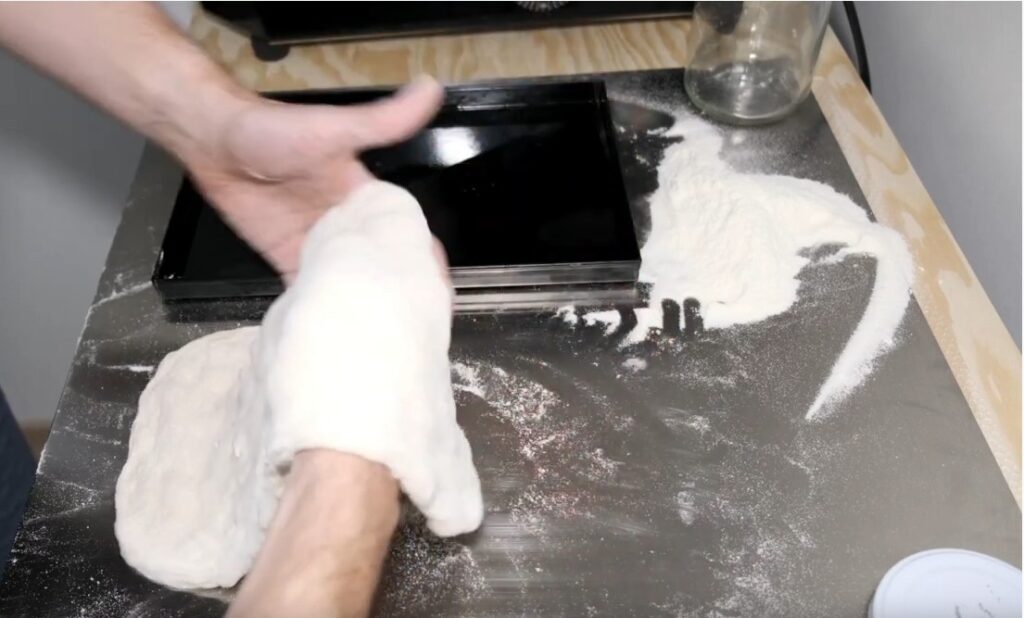
- with the help of your forearm move the the stretched dough in the sheet tray
- adjust the dough to cover the entire sheet tray
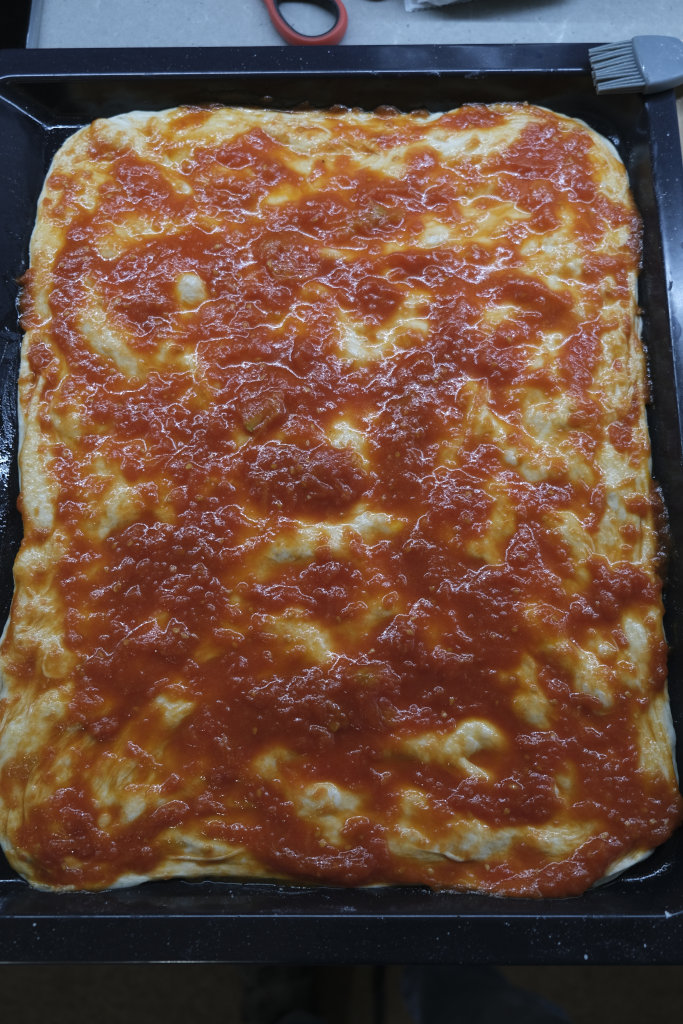
After the above steps you want to cover the surface of the dough with the tomato sauce we prepared before. So, take the pan with the tomato sauce, remove the garlic from it and fully cover the dough surface:
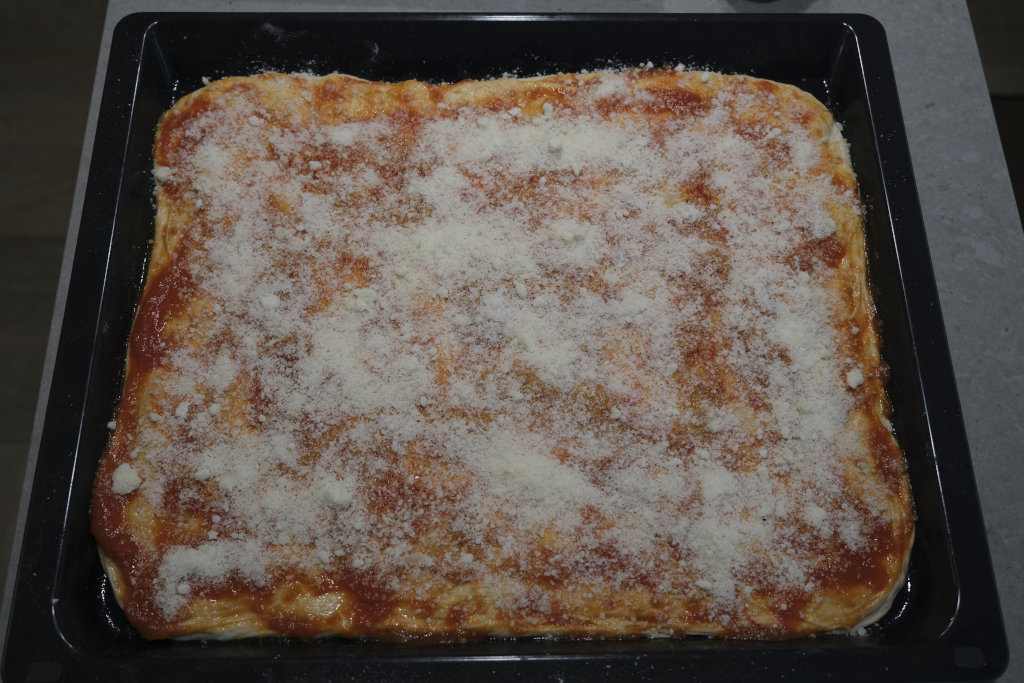
Now one more step: let’s add quite a lot of Pecorino cheese. I don’t give you exact amount because it really depends on how much you like it. In my Grandma tradition it had to be quite a lot as you can see in the next picture:
Only now we are ready to move to the next and last phase: cooking the dough of the definitive recipe for modern grandma pizza.
Cooking Pizza in Home Oven
After we finished to stretch and seasoning the Pizza Dough we turn on the oven. As my Grandma was always saying: the dough needs to have a rest in the sheet tray. So we will follow my Grandma saying waiting for the oven to reach the desired temperature of 250 °C / 480 °F.
Once the temperature is reached we can put the Pizza in the oven. Do not forget to add a little bit of extra virgin olive oil on top of your pizza before baking.
I generally prefer to start cooking with the sheet tray at lower part of the oven, instead of the middle. I then move the sheet to the center of the oven after 9 or 10 minutes.
After 12 to 15 minutes your Pizza should be ready. You can confirm that looking at pecorino cheese… when it starts to become brown it’s done.
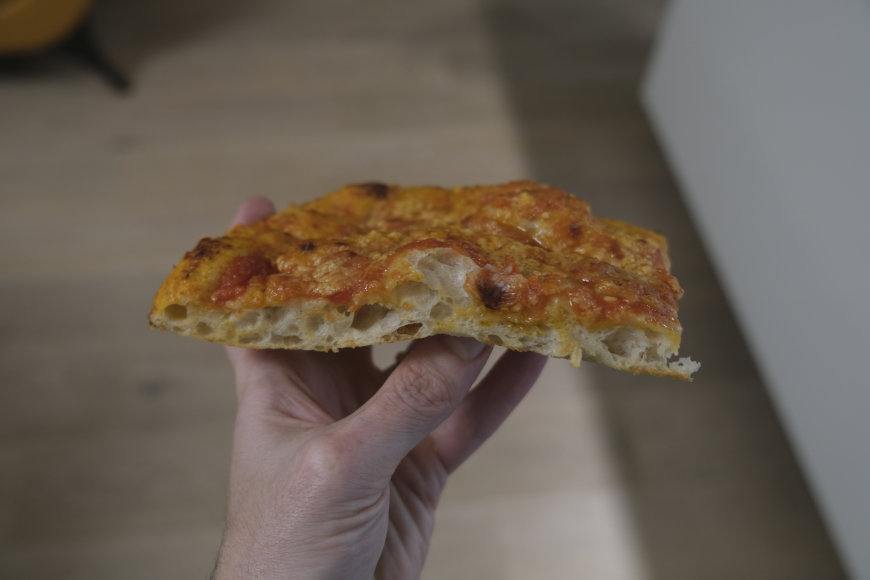
I hope you enjoy this recipe soon. And as always, if you have doubts or need clarifications feel free to contact me or leave a comment.
Before you go consider to subscribe to my newsletter. It’s free, you will get a Recipe Notebook to download and you will never lose my new tips & tricks around the world of Italian Pizza. I hate spam too, so no worries, subscribe with confidence:



1 Comment