Ultimate Guide to make Stiff Sourdough Starter from scratch
Last updated on November 12th, 2023 at 07:07 pm
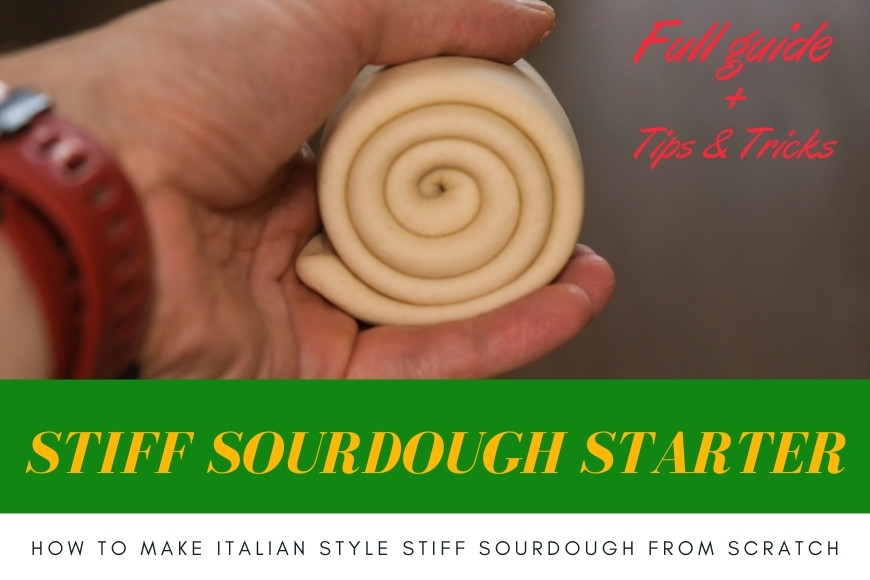
Call it how you want. Natural Yeast, Sourdough Starter, Stiff Starter. In Italy we call it Lievito Madre (mother yeast) and we do it stiff. Joining my Ultimate Guide to Italian Sourdough Stiff Starter you can make your own Stiff Starter from scratch and with no efforts. I went through this process during the last weeks. And while doing the Stiff Sourdough Starter you see in picture I collected a lot of experience.
I want to give you a comprehensive guide to make a stiff sourdough starter.
What you can expect from this blog post is to be able to prepare and maintain a sourdough starter like the one we generally prepare in Italy. Indeed we use quite often a stiff one, called “mother yeast“. This is different than the standard liquid sourdough starter.
Without any other preamble let’s recap today’s topics:
- What do we mean by Stiff Sourdough Starter
- Essential kitchen accessories
- Ingredients for the Stiff Sourdough Starter
- Preparation calendar
- Tips & Tricks
What I promise is simple. At the end of the journey you will enjoy a typical Italian natural Yeast. For some of your recipes you can think about replacing the yeast you now use with this Stiff Starter. In future I will share Sourdough Recipes but also when and how to use it. But now let’s start from the beginning.
What do we mean by Stiff Sourdough Starter
You most probably already know what a Sourdough Starter is. If so you also know that it is almost liquid. The reason of its liquid state is the amount of water you mix with the flour. In fact a liquid Sourdough Starter is created mixing same amount of quantity of water and flour.
For example, you can start your sourdough with 100 grams of water and 100 grams of flour. As soon as you start mixing the two ingredients you notice that the compound never becomes stiff. And this is absolutely fine.
On the contrary, a stiff sourdough starter, or Lievito Madre as we call it in Italian, has a different proportion. Generally you use 50% or less water on the flour. If you follow my ultimate Guide to Italian Sourdough Stiff Starter published here you will end up with a Stiff Starter with 44/45% of hydration.
Liquid Sourdough vs Stiff Sourdough
But why and when do we use a stiff sourdough instead of the liquid sourdough starter? Well, I would probably need a dedicated blog post for it. The two starters are indeed pretty different in their usage as well as in the way you feed them. Let alone the final result they bring to your Pizza or bread. In few words: the life that you are creating is different. However I can tell you that the stiff starter is ideal for pastry like Panettone but also my favorite for Pizza and Focaccia.
On the other end the liquid Sourdough Starter is mostly used for bread. Even though this is not really a rule. You can use the stiff sourdough for bread as well, no issues.
Probably the real final difference is in the taste. From my point of view the aroma and flavors of the Stiff Sourdough are much more pleasant and you can really notice them.
Essential kitchen accessories
When it comes to needed kitchen accessories I am pretty sure you have already everything you need. In some cases you can use what you have in your kitchen and avoid buying new utensils. What I can tell you is that having the right utensils in some cases helps. Especially if you want to have an easier life. And believe me, at the beginning this is pretty important. Read the following Tips&Tricks to understand what I mean 😀
Let’s arrange a list:
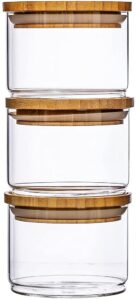
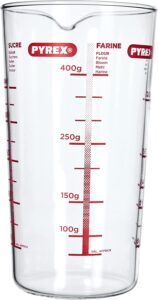
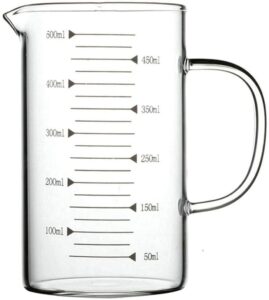
- two glass recipients, like jars or dry measure jug (even better). Ideally with straight sides or at least with a large opening (pictures below);
- a kitchen scale;
- a gauze (for food ideally but a standard sterile is still fine);
- two rubber bands;
- two spoons (you will understand shortly why);
- a sharp knife (or blade);
- a room thermometer (not really essential but it helps).
Before starting this amazing journey let me say that you really need a couple of jars/recipients to start. As you will discover, when you feed the Sourdough during the initial phases it will be much faster and hassle-free to have a second recipient. Indeed cleaning the used one will be not a quick action 🙂
Ingredients to make Stiff Sourdough Starter
I decided to make the Stiff Sourdough Starter in the simplest possible way. On the Internet various guides suggest to use sugar, honey, fermented water and so on. But I think this is over-complicating the process. Moreover you don’t really need all of that. Therefore I will focus on the only two ingredients I used for mine. Another “ingredient” that you need is the right temperature. Read my Tips&Tricks below to understand more about it.
A good Stiff Sourdough requires only two ingredients to start: flour and water
A good Stiff Sourdough requires only two ingredients to start: flour and water. Maybe the most critical part of the process is to find the right ones and then work with the right temperatures. Apart from that there is no need to any other addition. On the contrary one of the most known experts in Sourdough and pastry chef, Francesca Morandin (daughter of Rolando, a real authority in Italy when it comes to fine pastry-making) , suggests to avoid using anything else than Flour and Water. Unless you can start a real “mother yeast” but that’s a completely different story.
Let’s spend a few words about the two ingredients.
Flour for Stiff Sourdough Starter
When it comes to Flour you have two options. The first one is to start your stiff sourdough with Rye Flour. Be careful, however. You will use Rye flour only and exclusively the first day. The you will continue with a standard soft wheat flour. Ideally you want to use a Type 0 or Type 00 Flour. Check what is the equivalent flour in your country here.
There is always a debate about Flours technical aspects. There is not best flour for Stiff Sourdough Starter. However I prefer to use a so-called “strong” flour. Specifically in my sourdough I preferred a flour close to the one I think I will use in my recipes. Remember that it’s a good thing to chose the initial flour technical aspects. And that’s also important to buy enough of it. Sourdough does not like when you suddenly change flour to feed.
Now, I would like you to read the label of the flour and try to find one that has a good amount of proteins. 12/13% of proteins is what I suggest. Also, if you want to make pastry maybe you want to use even a stronger one. However this is not a rule. So don’t worry about that but mostly think about the amount of proteins I recommended before.
If you are curious I am using a Flour meant to do bread, with 13% of proteins. You can find it on this link to have an idea.
Best water for the Sourdough Starter
You can use tap water. However, it is important to follow a couple of recommendations.
If you can filter it with a water pitcher filter, do so. Otherwise I recommend you to put water in open recipient for at least couple of hours before using it. In this way chemicals potentially in water will evaporate. Moreover the temperature of the water will be closer to the one of the room.
In case you are not sure about the quality of your tap water buy it. Of course you want to prefer still water.
Last but not least: never use cold water.
Preparation calendar
We finally arrived at the most juicy part of this Ultimate Guide to Italian Sourdough Starter. Indeed I am going to share a calendar that you can use to prepare to prepare your Stiff Sourdough like mine!
This calendar contains also quantities to flour and water to use. Please remember to read carefully my Tips and Tricks in the next paragraph. You will need them to understand the process and make sure you don’t make errors
| Day | Feeding times | Flour | Water | Sourdough (take it from the center) | Notes |
|---|---|---|---|---|---|
| Day 1 | 1 | 200 gr | 100 gr | - | Mix ingredients until you have a smooth ball |
| Day 3 | 1 | 100 gr | 50 gr | 100 gr | If the previous compound doubled before 48 hours you have to anticipate the feeding by 12 or 24 hours. So this may became your second day instead of third |
| Day 4 | 1 | 100 gr | 50 gr | 100 gr | Keep feeding the sourdough. Two more days to go. |
| Day 5 | 1 | 100 gr | 47 gr | 100 gr | Keep feeding the sourdough. One more day to go. |
| Day 6 | 1 | 100 gr | 47 gr | 100 gr | This is the last day before changing the schedule |
| Day 7 | 2 | 100 gr | 47 gr | 100 gr | Today you can expect the sourdough doubled in about 12 hours. If so, you will feed sourdough 2 times per day. Otherwise read below the Tips And tricks section |
| Day 8 | 2 | Second feed only: 130 gr | Second feed only: 62 gr | Second feed only: 65 gr | Today you will feed two times again. The first feeding will happen with same ingredients quantity as previous day. The second feed requires to follow the table columns C, D, E |
I made some of the fields of the table in Bold. You want to pay attention to them. Especially The first two rows. In fact it happens often that after only the first day your Sourdough Compound immediately doubles in size. If this is the case you want to feed it before waiting 48 hours. This is a pretty important step to keep in mind.
Also note that during the first day of fermentation is possible that mold appears. If this is the case go ahead immediately with removal of infested parts and feed the compound.
How to mix ingredients and arrange the process
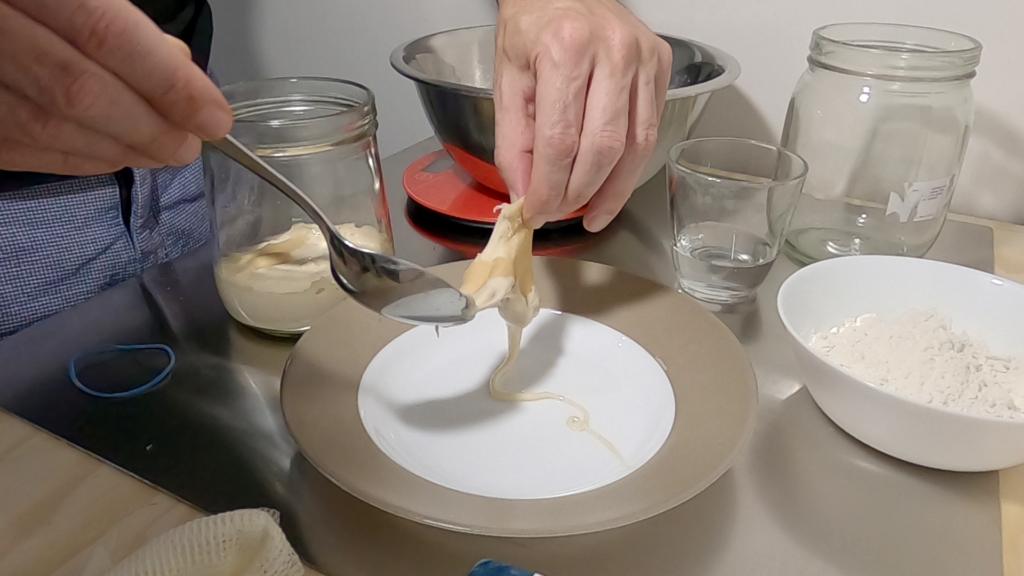
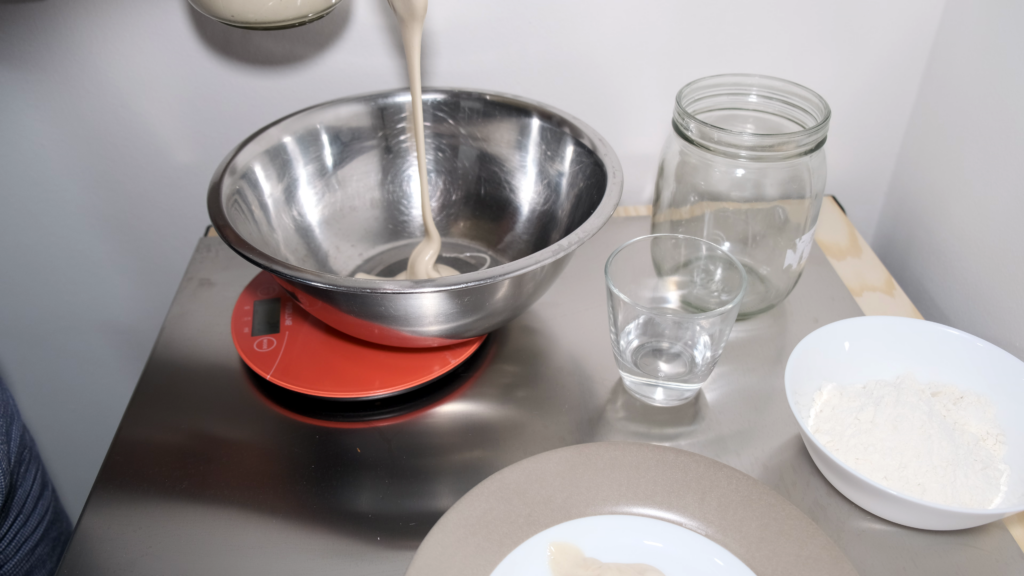
So, on first day, take a bowl (or any other recipient) and add there Flour and water, all together. I suggest you to use a spoon to mix ingredients. Only when flour and water are well combined you start using hands. You don’t really need to knead like a Pizza Dough, for example. It is enough to make the compound more or less smooth on its surface:
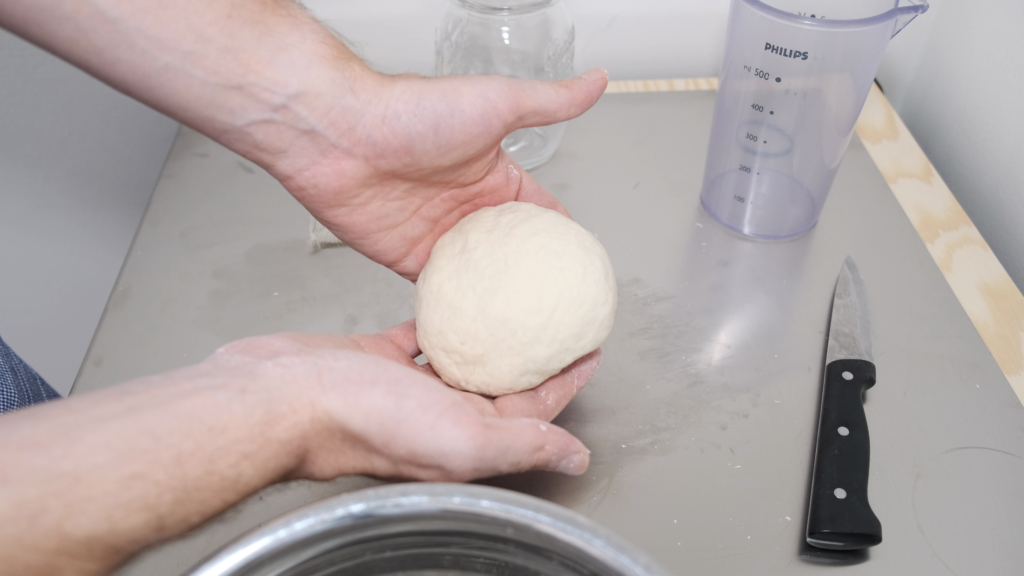
Once you finish to mix move everything in the jar or recipient. Make sure the compound is well touching the side of the recipient. This will help you understand if it starts to ferment. Moreover the side of the jar will sustain the rising, as soon as it starts.
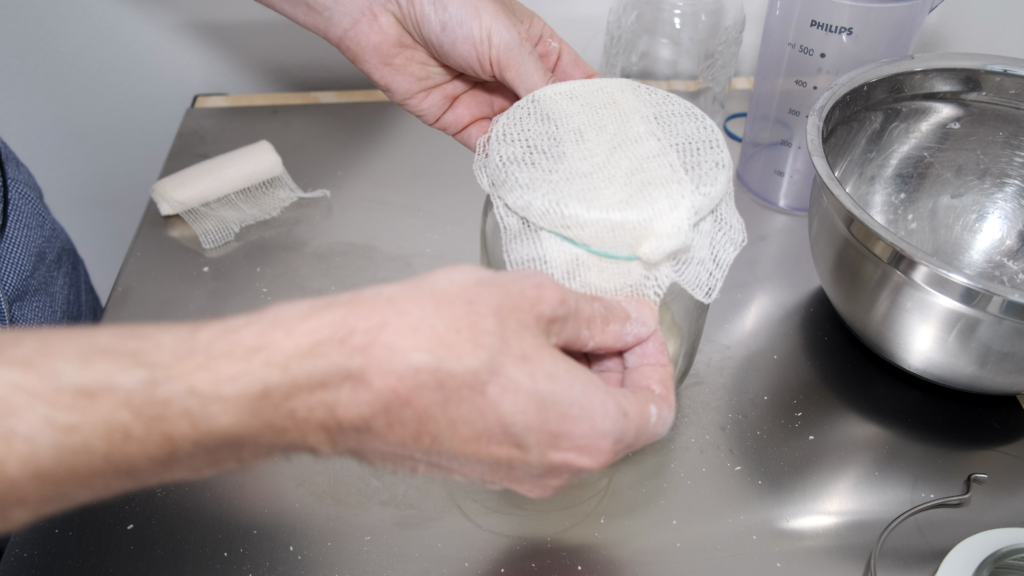
Then take the gauze and cover the jar. You want to block it with a rubber band to make sure it does not move. The gauze is important because it will permit the air to go in and out while preventing other elements to “infect” your product.
Also take a second rubber band and try to put it on same level of your compound. Using this rubber band is pretty important. Indeed you will immediately notice if the Sourdough started to ferment and grow. Finally move the sourdough in a place of your apartment where you have 25/26 or more Celsius degrees (up to 28 is perfect).
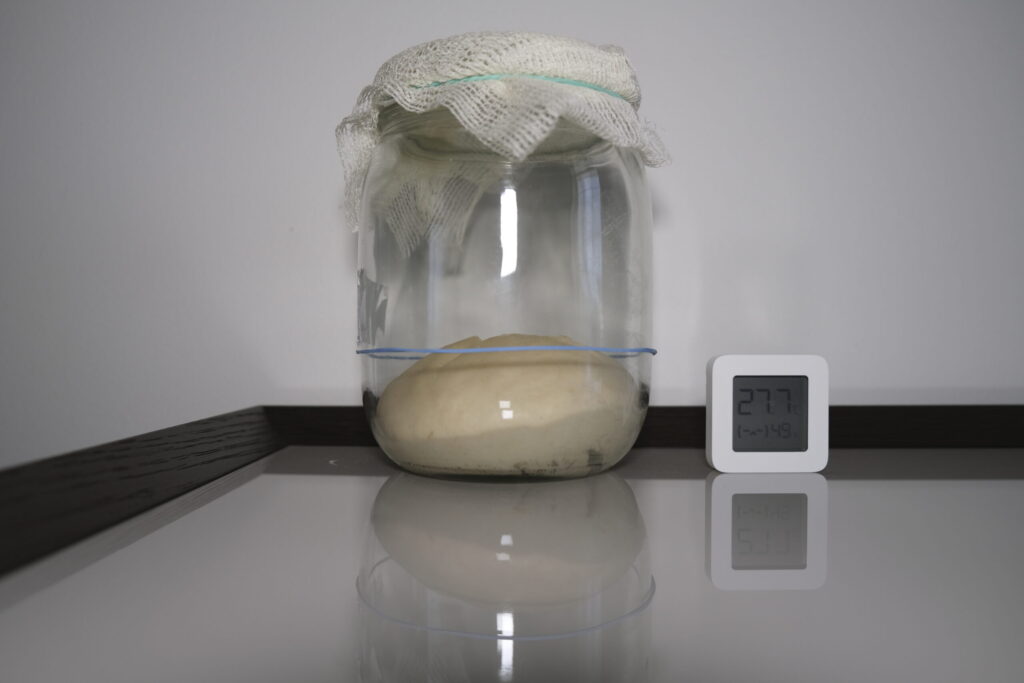
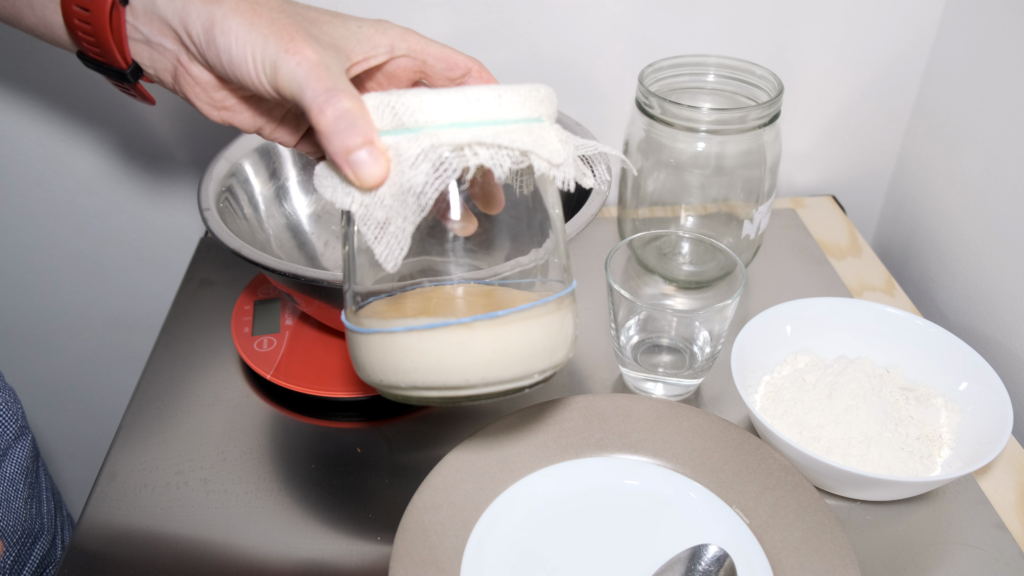
After 48 hours (or less if you have the compound doubled) you can start the feeding process according to the table above. Let me remind you that from this moment you start using three elements: flour, water and part of the previously kneaded compound. For the latter make sure that you remove the top and dry parts. You absolutely want to take 100 gr from the heart of it. This is where “life” is happening!
One more thing, no worries if the sourdough is liquid at the moment. Also do not worry about weird smell, everything is fine. From now on just make sure to follow the process.
How to continue the process
What I described above has to continue daily. Just pay attention to the amount of water to use. As you can see from the table it will start to be less after a few days. Anyway stick on the daily routing until you get for the first time the Sourdough doubling in size within 12 hours. When this happens you are almost at the end of the creation of the sourdough starter from scratch.
Doubling in just 3 or 4 hours: you now have a fully active Stiff Sourdough!
From the moment you see the Sourdough doubling fast you can arrange the two times feeding per day. At a certain point you will realize that that your new life is doubling in just 3 or 4 hours: this means that you now have a fully active Stiff Sourdough!
That means also that you can start storing the sourdough in the fridge and change the schedule of the feeding process to a less strict one. However I prefer and recommend to feed your sourdough daily for the first few weeks or even a month or two. It will help to keep the right acidity and also to strengthen the Stiff Sourdough Starter for its first use.
One important note: when the sourdough is ready it becomes stiff. When you manipulate it for feeding you will realize that is pretty hard. That’s fine, this is why we call it stiff!
The Sourdough is ready: make it stronger!
Once you created your Italian Style Stiff Sourdough Starter and you move it to the fridge, you can also start storing it and feeding it with a different technique. Essentially you can fold it after feeding. Finally you store it giving it a snail shape and then making two cuts on the long side.
A few pictures are much better than words to explain:
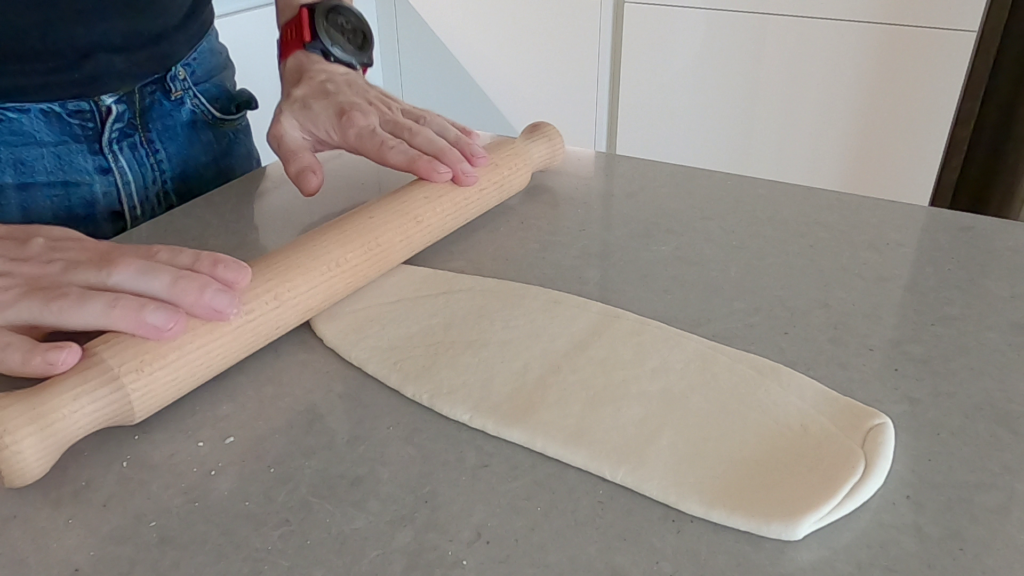
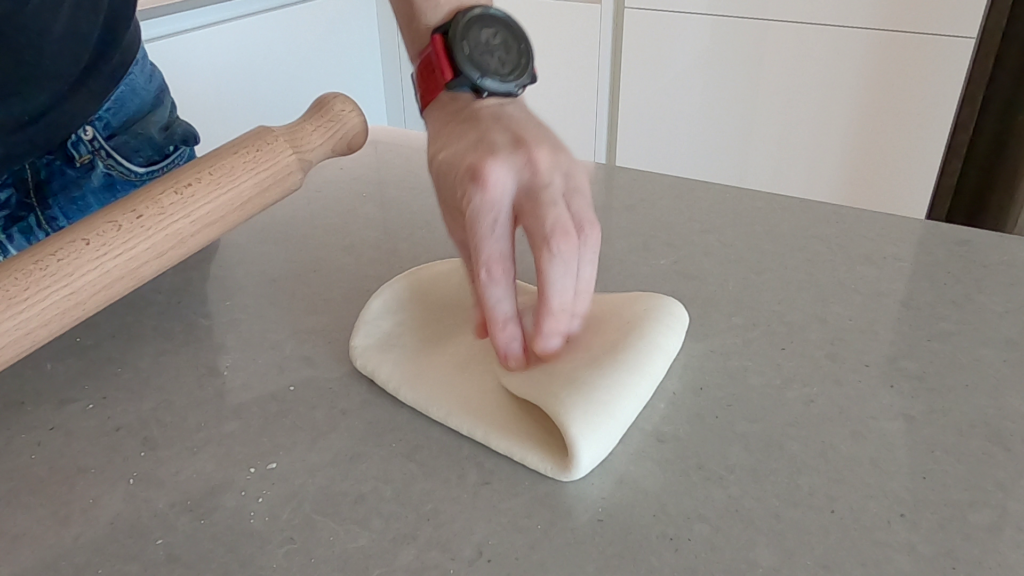
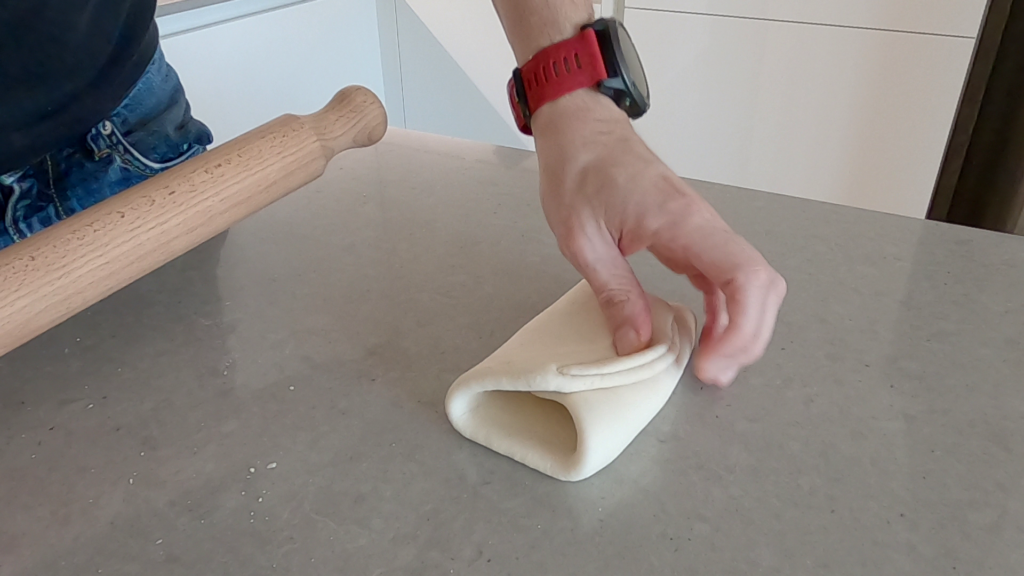
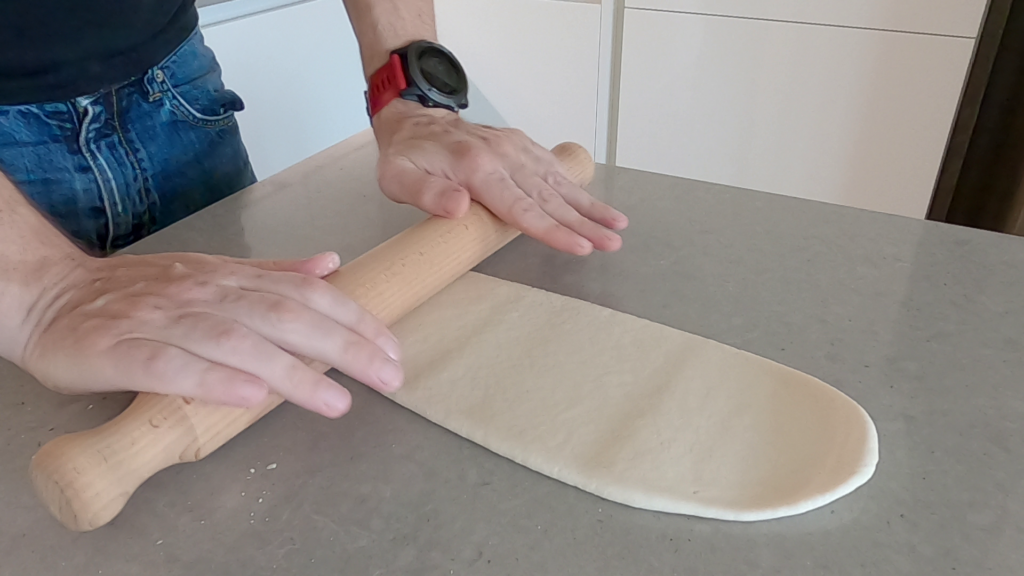
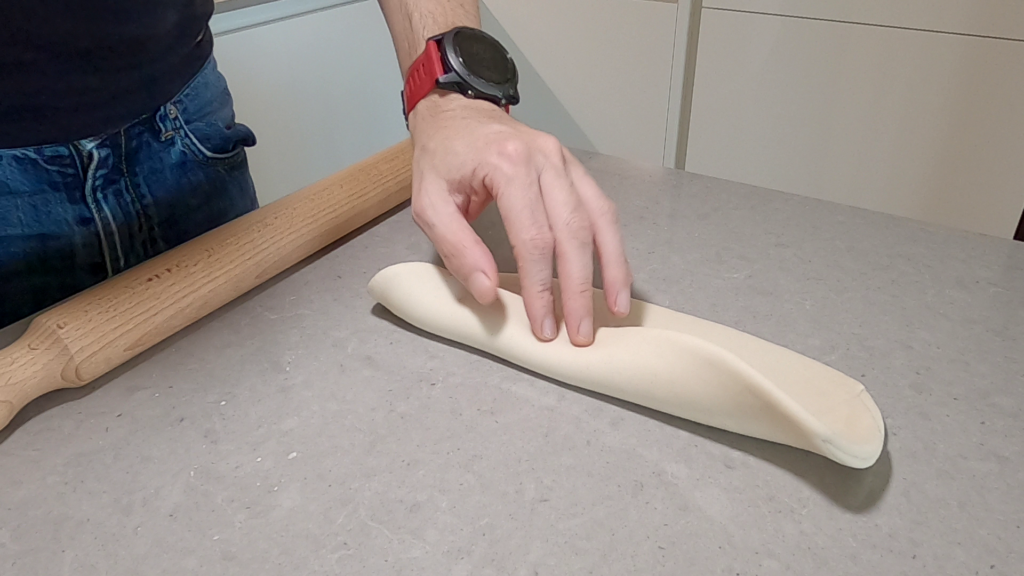
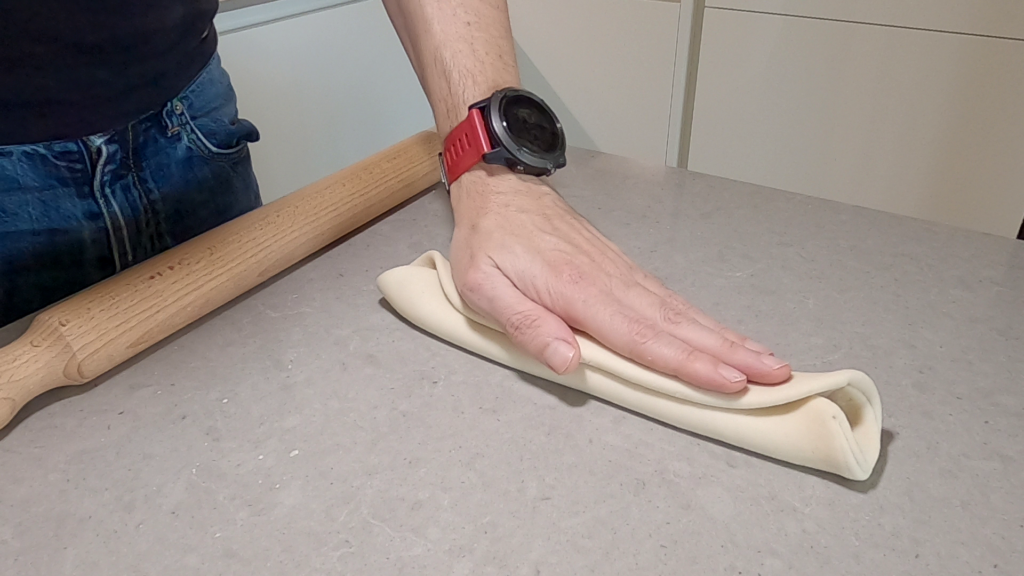
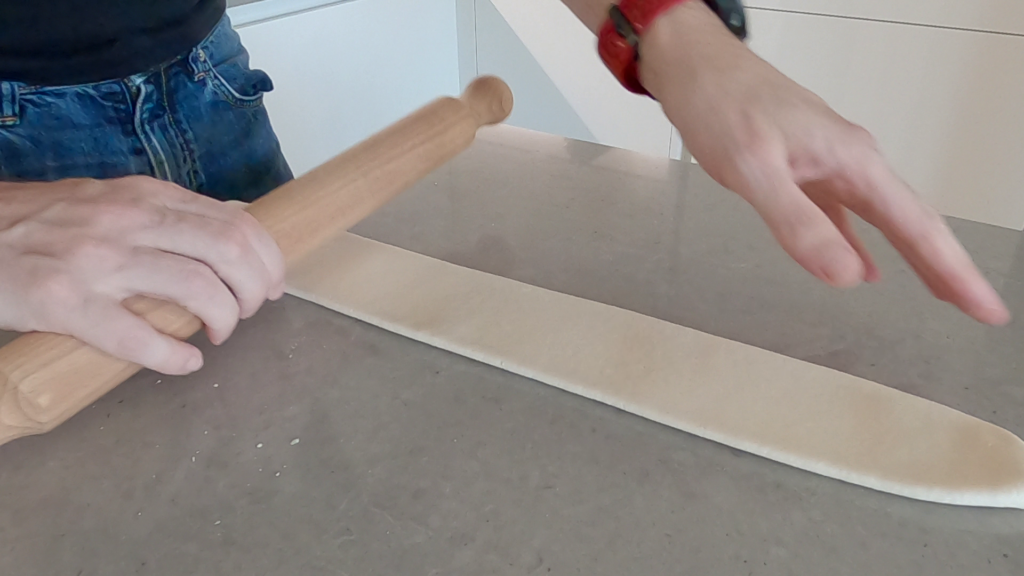
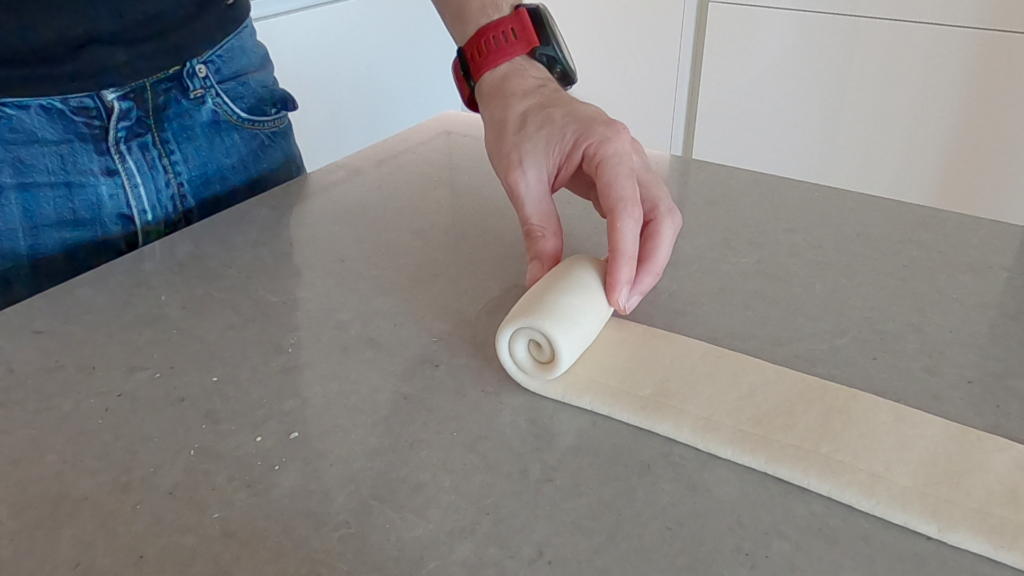
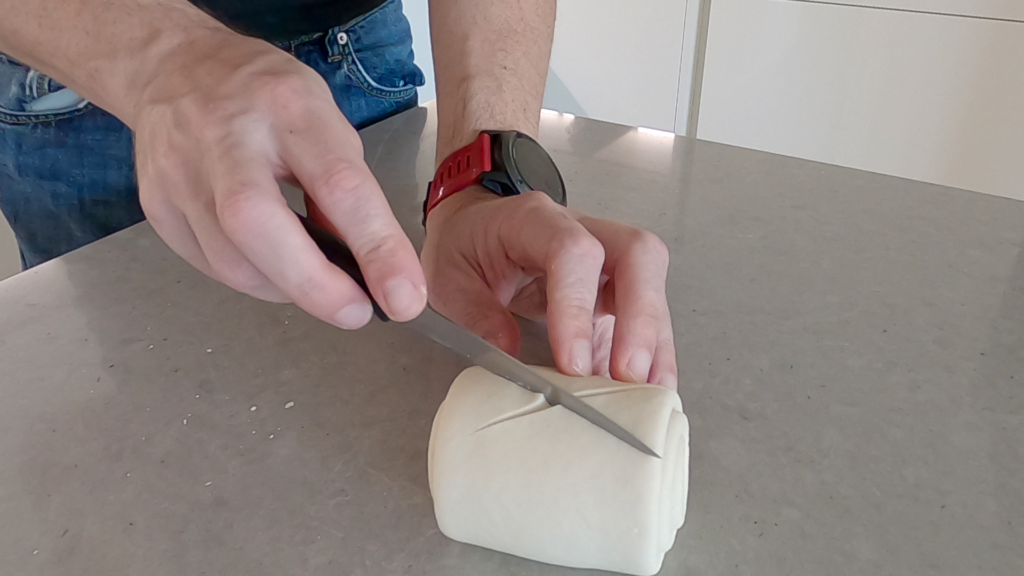
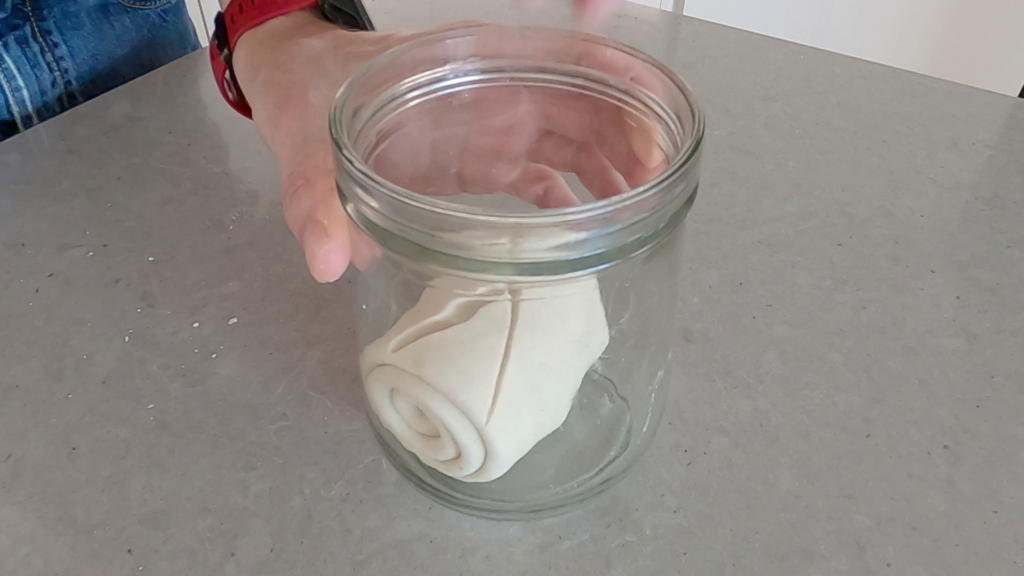
No worries, for this specific technique I will have a dedicated blog post. Therefore we will have time to talk about how to feed and store you Italian Style Stiff Sourdough Starter.
Tips & Tricks of Ultimate Guide to Italian Sourdough Starter
And let’s conclude this guide Providing you a list of best practices to make a Sourdough Starter from scratch. Or if you want, some Tips and Tricks. I am confident that you will enjoy this journey much more taking advantage of my experience.
Sterilize your container/avoid soaps
My first tips is: use glass containers. In fact these are the best to avoid contamination. Every time you use the container/jar/jug make it sterile. This is incredible important during the beginning of creation of Sourdough starter.
Using glass you can clean them with water (and only water!!). After that you put them in the oven at 110/120 Celsius degrees for 10 to 15 minutes. This will help to avoid that external agents influence the life you are creating.
Last but not least: never ever use soap! No matter what soap it is. Soap will simply kill bacteria that you need in your Sourdough. So be careful also when you clean your kitchen top. After using soap there, make sure you rinse properly with water.
Get two jars or jugs
To start your stiff sourdough starter you want two recipients. When you will be feeding every 24 and later 12 hours you want to have one of them clean and ready to store the just fed compound. As you will realize pretty soon (right after the first 24/48 hours of the cycle) is that the compound is very sticky! As a consequence, to clean the jar/jug you will need a bit of time and efforts.
Definitely you don’t want to spend too much time cleaning a previously used recipient while your just fed sourdough is waiting to be stored.
The role of temperatures
Pay attention to this piece of information. This is the most important requirement you need to start your artisan sourdough. In fact sourdough starters require summer temperatures at home. Don’t expect to have your brand new Sourdough Starter easily if you don’t have a warm room temperature.
To prepare your Artisan Stiff Sourdough Starter you need to store the compound at a temperature between 25 °C (77 °F) and 27 (81 °F ) °C degrees. This is why it is generally recommended to begin the process during Summer.
But no worries, if your room temperature is not that high you still have another option, or two. The ideal temperature for Sourdough Starter creation (and maturation) is 25 to 27 °C degrees, right? Well, to arrive at a similar temperature you can use the oven instead. What you can do is to keep the oven turned off and only switch on the light. When you do this you will easily reach 28/30 °C degrees. Therefore, just be careful not to keep the light on too much time or the temperature will grow too much.
If the oven is not an option or is too hard to manage with turning on and off the light there is another thing you can do. You can buy a couple of accessories to build your own rising box. However, I understand that not all of us want or know how to build a box from zero. That is why my suggestion is to use the oven as your rising box. However, instead of using the embedded light, you can use a Digital Temperature Controller with a Heat Cable. Leave a comment if you want to know more about this option.
The Sourdough Starter does not double?
When you initiate your Italian Style Stiff Sourdough Starter you have to deal with a couple of situations. Firstly you want wait 48 hours on Day 1 before starting feeding. However, you can be lucky and have the sourdough doubling in much less hours. If this is the case you have to anticipate the first feeding. Also during the next days, if your Sourdough starts to double in less time, move to the next phase of the cycle (reducing amount of hours for feeding and using less flour).
On the opposite side it is possible that the Sourdough Starter does not double at all! Well, if this is the case: no worries! Keep working on the schedule I provided! Remember that you are creating a new life. Therefore this life has to adapt to the environment and it can take longer.
What I want you to do, anyway, is to pay attention to the compound just before you feed it. Turn the jar/jug upside down and check if you have some small bubbles. If so, it means that there is life! Go on with the schedule, you will see that from one day to another it will start growing!
Cutting the Compound – get a sharp knife
One last tip to close this article. You may have noticed that I use a Knife to cut the upper part of the Sourdough. You don’t have to do the same. The opposite. Especially during the first days just don’t do it, is not needed.
You can start making a cut on the top of your Sourdough when it is already stiff. It will help you understand how it is developing and when it’s best to feed it.
I hope you will enjoy this journey. I assure you is a pure pleasure! You now have all you need to have your natural yeast in its typical Italian style. It will be perfect for your Pizza, Focaccia and especially for Pastry!
Feel free to leave a comment and don’t forget to share on Social Media and subscribe to my newsletter to know more about Italian pizza world!


17 Comments
I listened to someone saying “store stiff starter in water” not sure what it means. Can you explain?
You can store stiff sourdough “free” (as you see in this article), tied in a pouch with a cord or in water. The management of sourdough in all cases is a bit different. Generally stiff sourdough stored in water is the one preferred to make panettone.
2 questions. Once the starter is doubling (day 8) can I store it like in your pictures, with a lid on it or does it have to be covered in gauze all the time?
When I want to use the starter for baking, how much starter do I use?
Hi Laura. If you followed the schedule and you managed to have the sourdough doubling in 7-8 days, then yes, you can start storing it in fridge. You don’t need to use always gauze but at the same time you don’t want to close it with hermetic lid. Stiff sourdough needs to breathe 🙂 For the amount of starter to use, there is not a single answer. It depends on the recipe. You need to experiment a bit with it. I use to use between 15% and 25%. Only for some complex sweets with a lot of fat inside you can increase the amount even to 30% or 35%
I would like to use the starter for focaccia, how do I do the math on flour/ water if you’re saying 15-25%?
Hi Laura, you need to calculate the % of starter on the flour, as you normally do for the baker percentage. For example: if you use 1kg of flour and you want to use 20% of starter, you want to add 200gr of starter. Let me know if that answers your question 🙂
I already have a liquid sourdough starter that has been active for 5 years and makes bread regularly. Can I make a stiff sourdough by adjusting the flour / water ratio over a few feedings until I get to the 100/50 ratio? How many feedings should it take to have a stiff sourdough? Can you recommend flour/water ratios? My liquid sourdough will double after a feeding within 6 hours, usually less. Thanks.
Salut j’ai vu ton blog c’est super intéressant j’ai une question quand je veux augmenter mon levain dur comment doit-on procéder est-ce que je rafraîchis la totalité du levain avec le poids du levain ou il y a une autre façon de faire car je vais faire une grande quantité de panettone il me faudra plus de levain merci
Hello Mourad, you will need to use as much as you can of your current sourdough and increase final quantity over time. The external part of the sourdough will still need to be removed as it is unusable.
Salut Stéphane j’ai un petit problème mon levain ne monte plus je fais le rafraîchit tous les jours mais il ne prend plus de volume je ne sais plus quoi faire je l’ai fait grossir et je l’ai stocker dehors à 16 degrés en faisant des rafraîchis tous les jours le pH est à 4.2 je le rafraîchit tous les jours avec le ratio 1.2.0,44